This article describes how to create a Personal View (User Query) in Dynamics 365 CRM. A Personal View (PV) of the entity you want to analyse needs to be created for Customer Verbatim to retrieve the data set from Dynamics 365 CRM.
Customer Verbatim is a single user product and is designed to use Personal Views that allow the user to easily change the filter criteria to create data sets for analysis. System Views are created and maintained by the Administrator and therefore are not as flexible, but can be copied to a PV. Therefore, when an entity is selected in Customer Verbatim only the PV for the logged on user will be shown.
To accomplish trend analysis Customer Verbatim requires two attributes:
1. Key field which should be unique.
For example, the key can be a text field in the entity that identifies the record and is human readable (case number, company name, contact name, email address etc.). If you do not have a unique attribute in your entity then a unique id field which is a GUID is returned with every view. This field name changes with each entity and is usually the entity name + “id” (accountid, contactid, incidentid etc.) and can be used.
2. Text
This text can be any free form text that you want to analyse. It does not have to be grammatically correct or even full sentences.
You may want to include other fields in the view which will help with your analysis such as created on date, created by or other information that will help. These fields will not be used in the text analysis but are carried along with the record as extension properties.
There are two ways to create a PV. I will cover each method to get a basic view and then add the specifics that are relevant to Customer Verbatim for both.
1. Open a System View and edit and save the view as a PV.
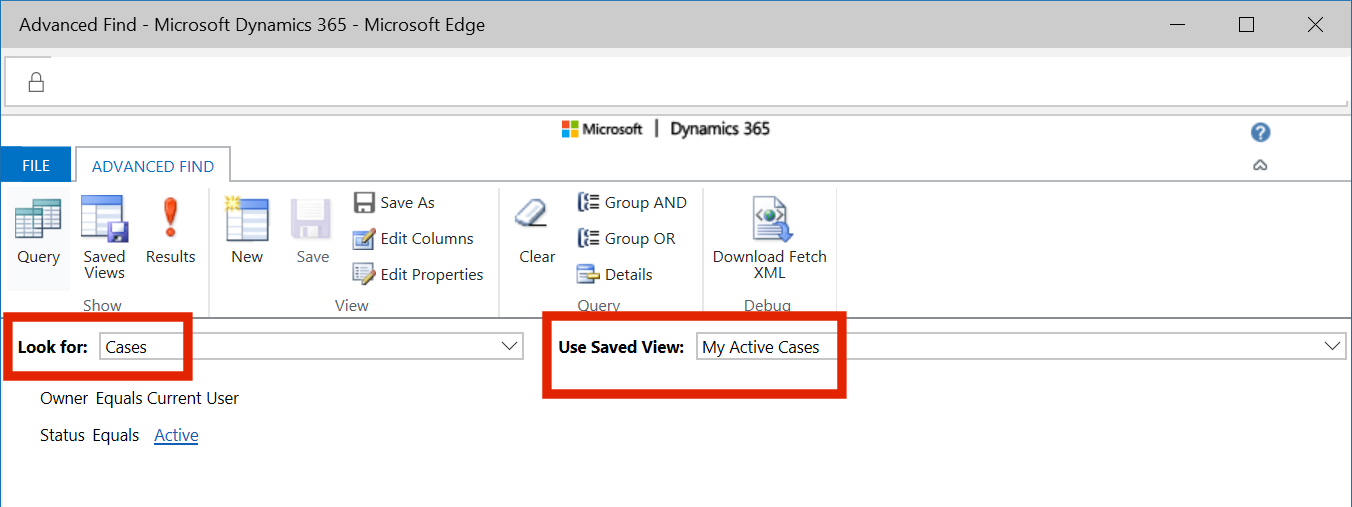
Any time you are viewing an entity in a grid you are using a view. To use this view as a template for your PV select the Advanced Find icon on the ribbon:
The Advanced Find will open another dialog where you can see that the template “Use Saved View” is the view you have selected for the entity “Look For”.
You now have a basic PV to start editing to use with Customer Verbatim. See Customise the View below to continue with the edit.
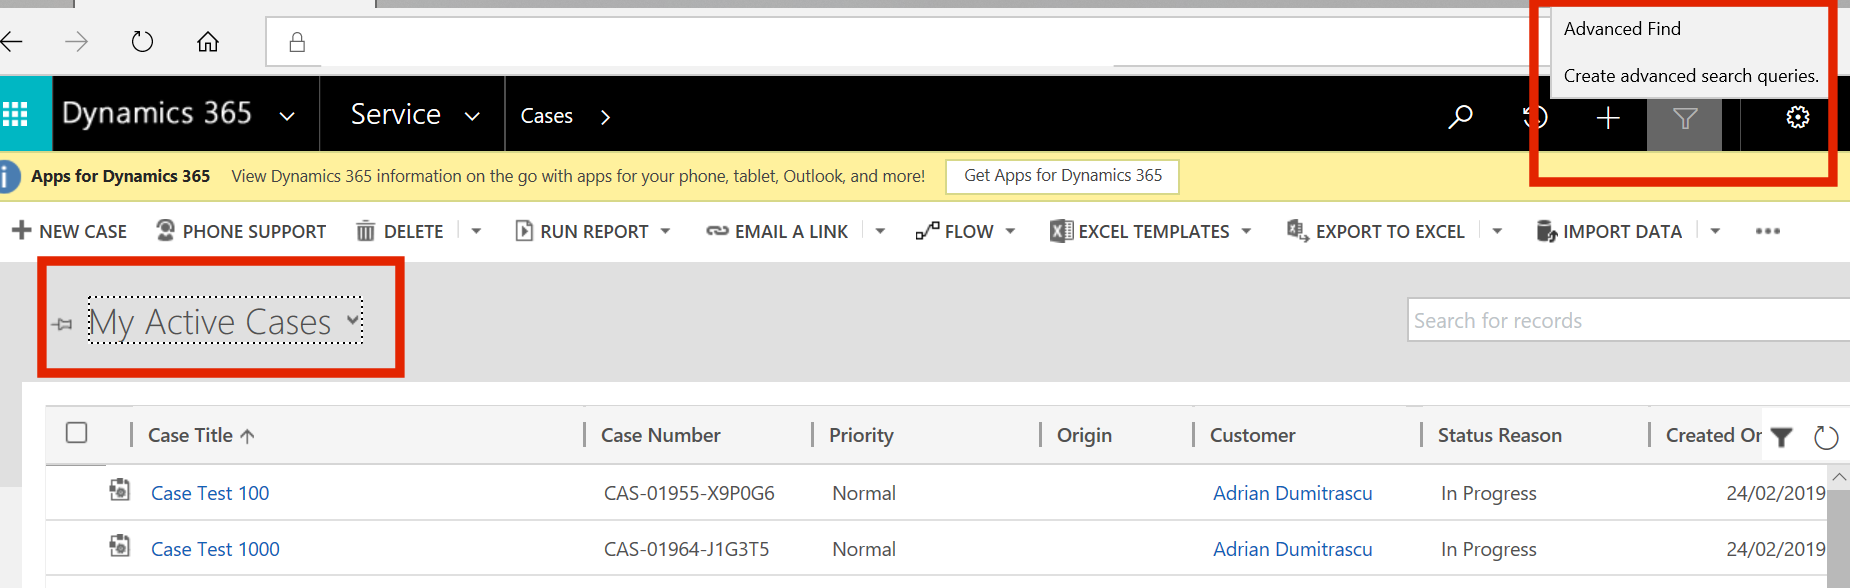
2. Start a New blank PV.
Open an entity. Select the drop down next to the default view name and select “Create Personal View”.

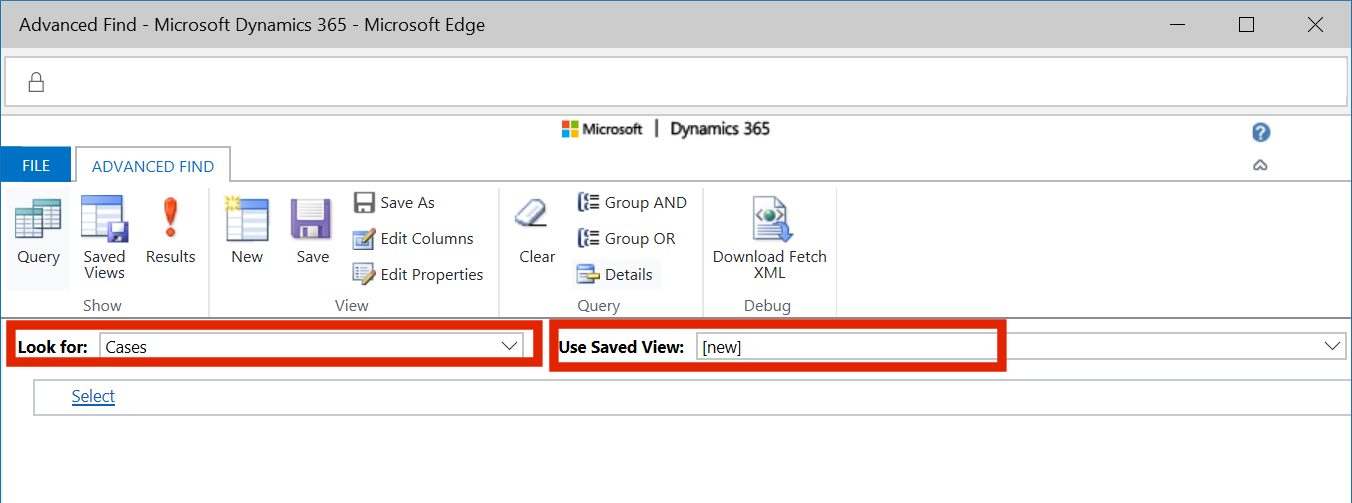
The “Look For” is set to the entity you selected previously, but the “Used Saved View” is set to [new] and there is no filter criteria set.
These are two of the ways to create a PV, so I will now cover tasks that are related to both methods from this point on.
Save the PV
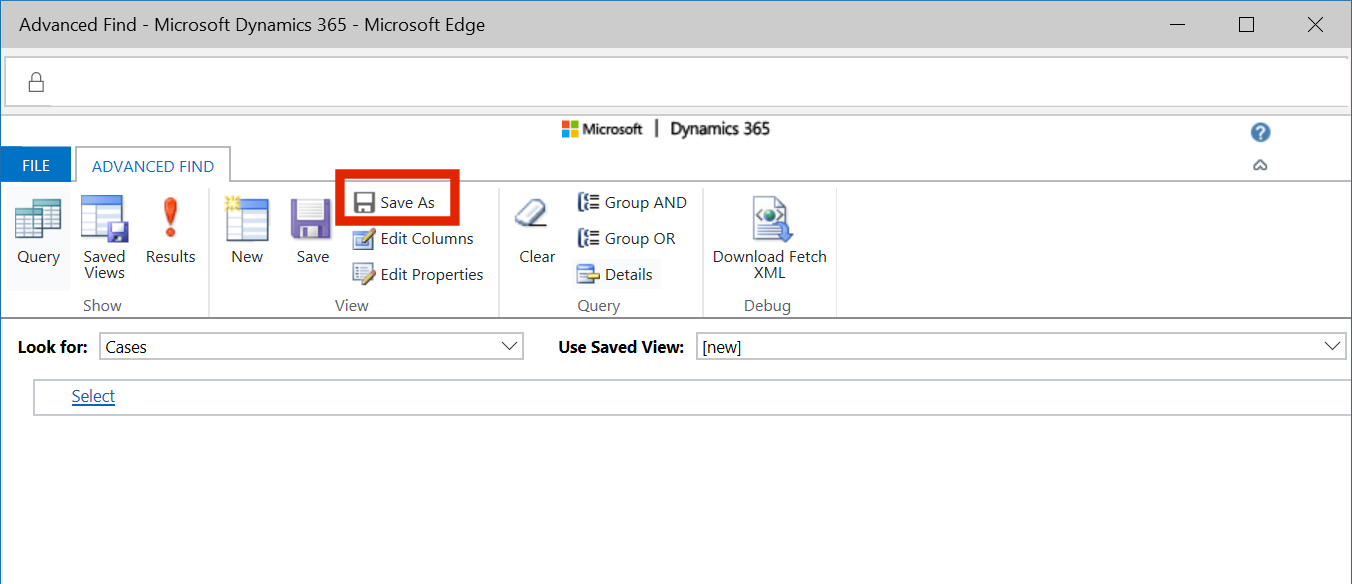
Before we go any further we need to save the view so that it becomes a Personal View saved against the current logged on user. Select the Save As from the ribbon.
Fill in the name and description, this is the information that will be shown in Customer Verbatim when “Get Views for Entity” is selected.

To select a Personal View you have saved select the Save Views ribbon element.
Customise the View
Make sure you have “Look For” set to the correct entity and you have saved the view and the “Use Saved View” is pointing to your file name.
Now into editing mode by selecting “Details” from the ribbon. You can now select options for the rows in the filter list, if you have any selected.
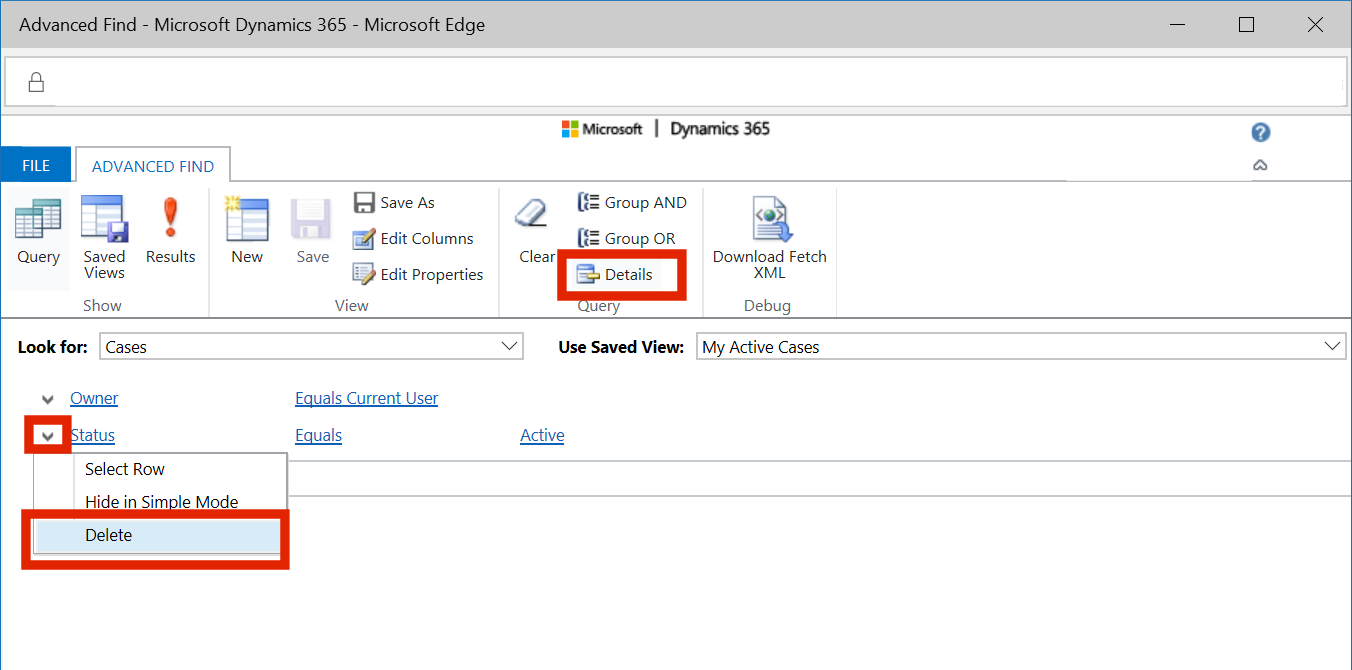
To remove filter criteria select Delete as shown above. To add filter criteria click on “Select” on the row and select a field from the entity. Then select then next field for comparison type and then if required the last field for the value of the comparison.
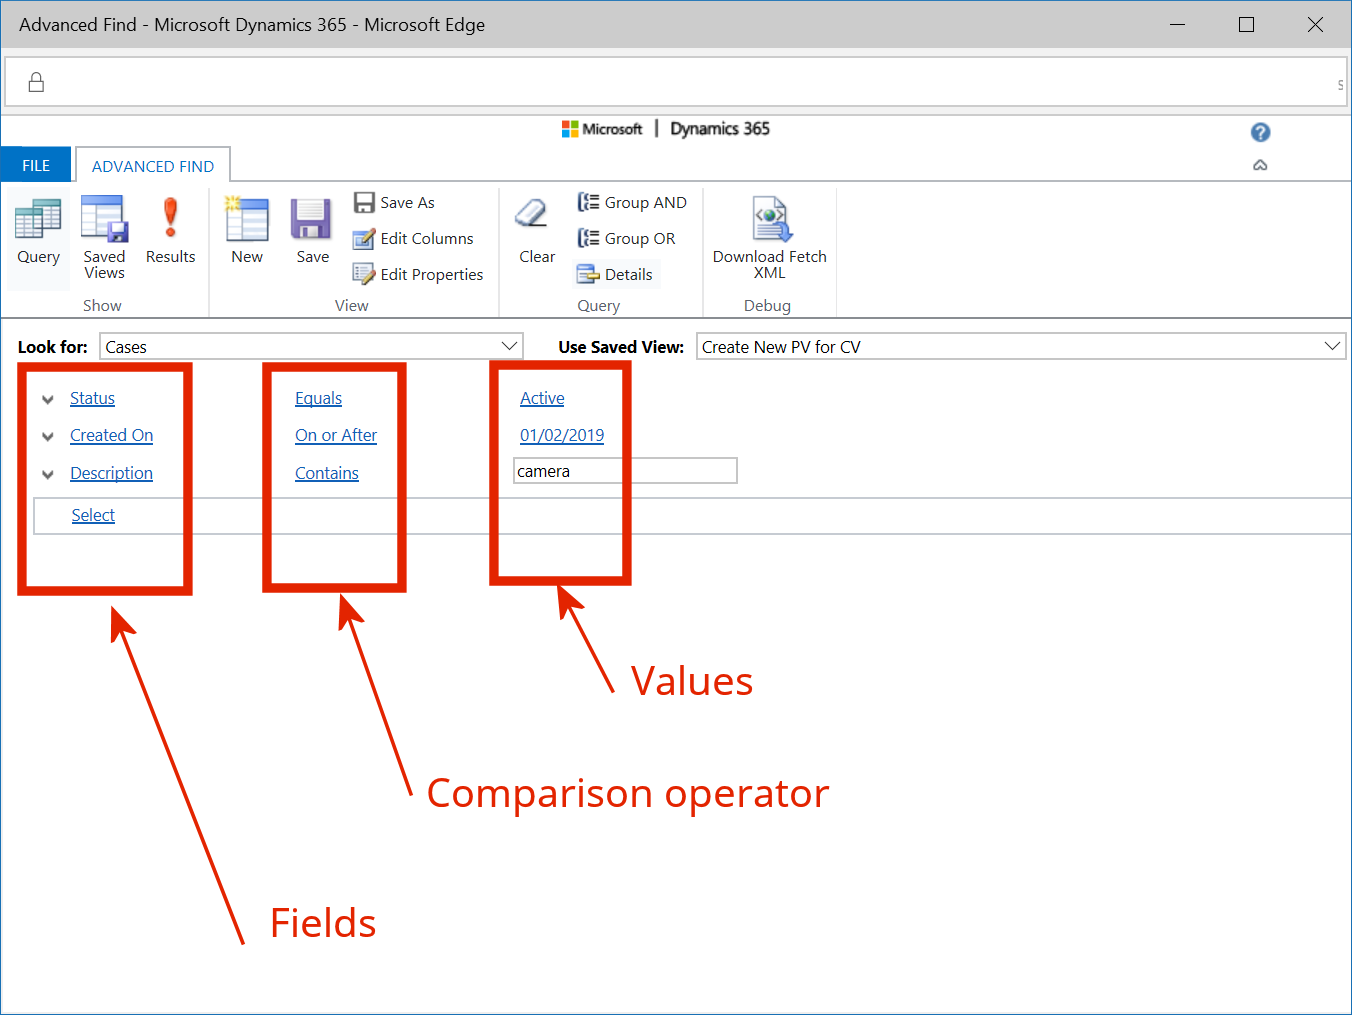
As stated above at least two fields are required for text analytics a key and some text. Also, just because you added a field to filter the data set it does not mean that they are included in the resultant data set as a column.
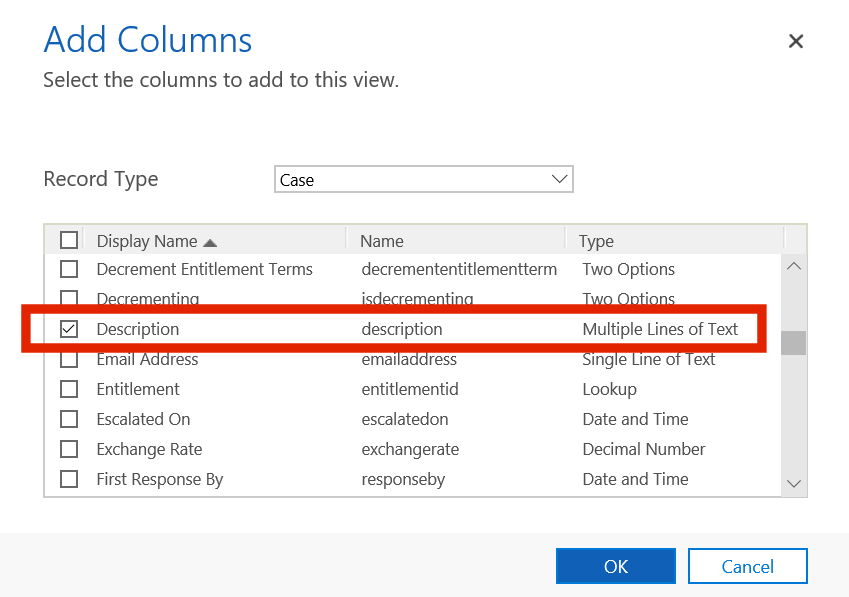
To edit the fields returned in the view click on “Edit Columns” and wait for a bit, for some reason this dialog takes a while to render.

You can see the columns that are already selected at the top of the grid. To add more columns select the “Add Columns” button on the right.
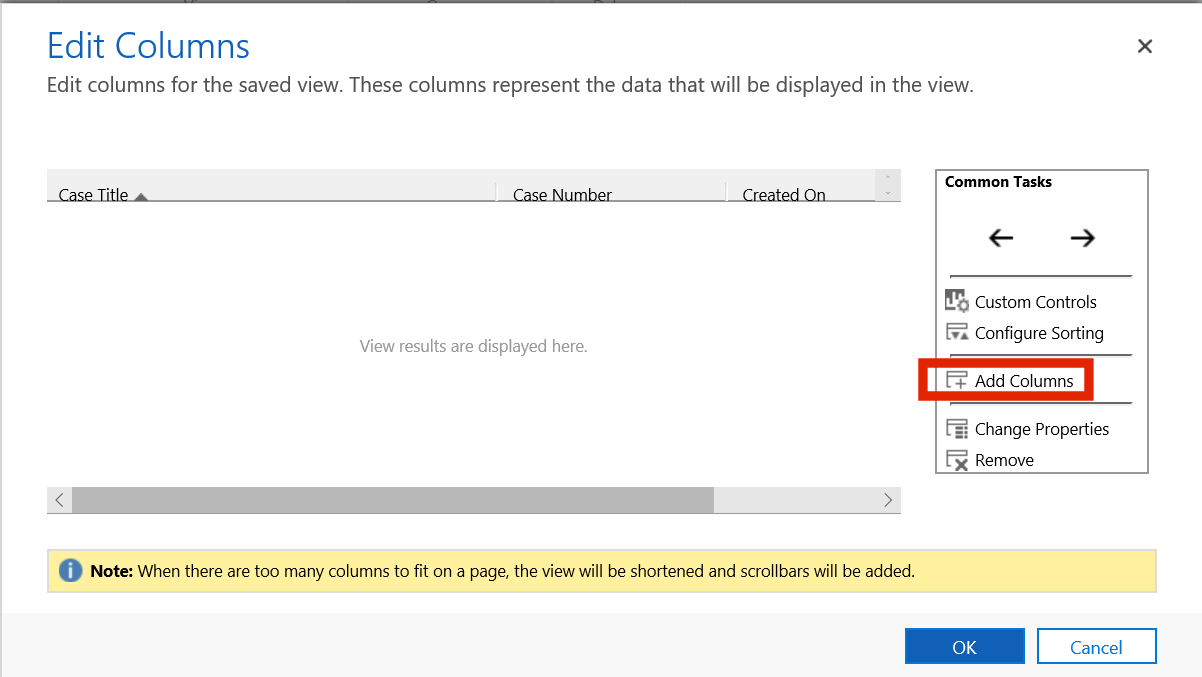
Once you add a column it is taken off the list so this list only shows fields that have not been included in the view. Here we select description for our text field and Case Number is already included in the view.
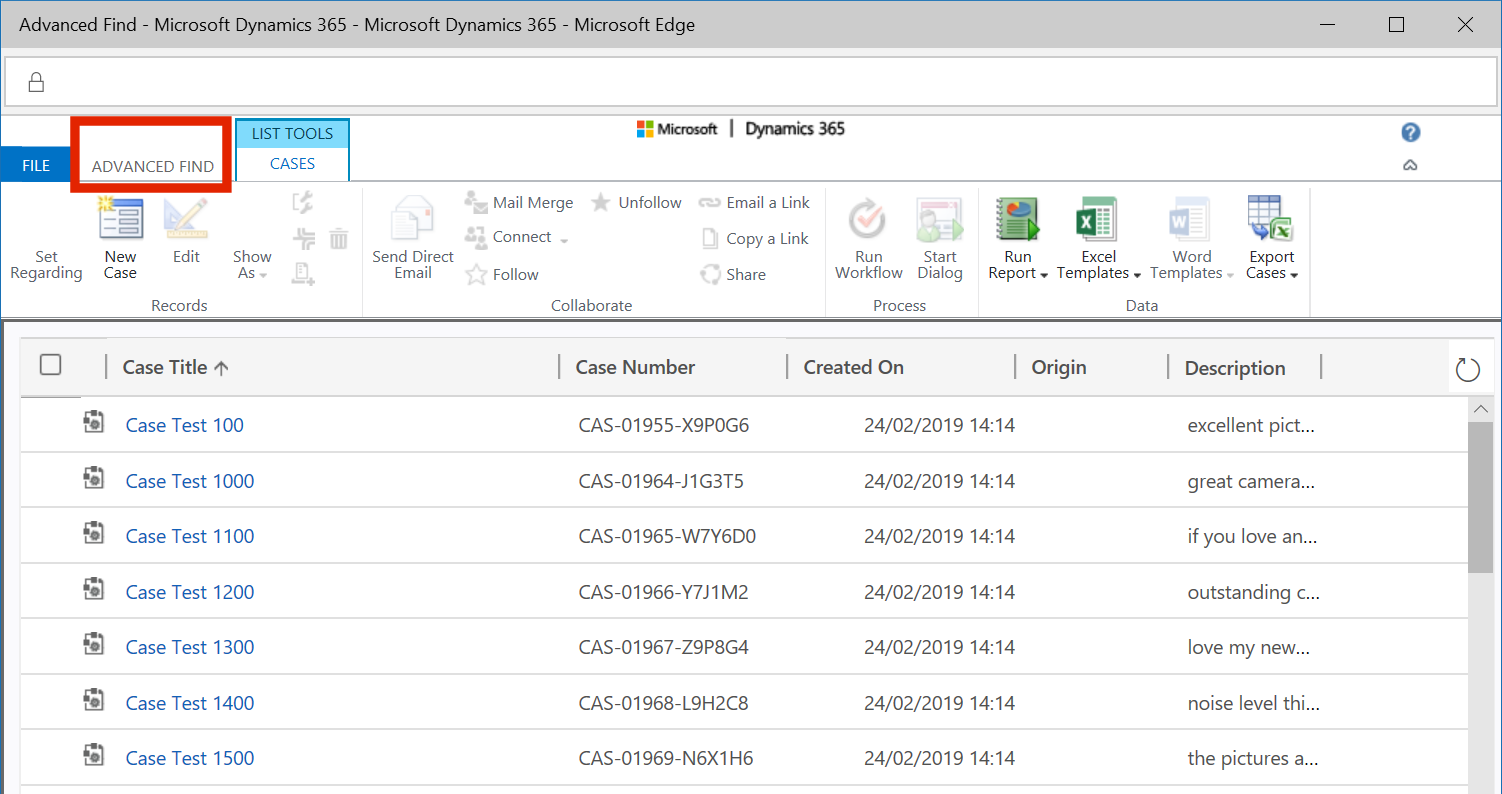
To see the data set selected select the “Results” button on the ribbon.
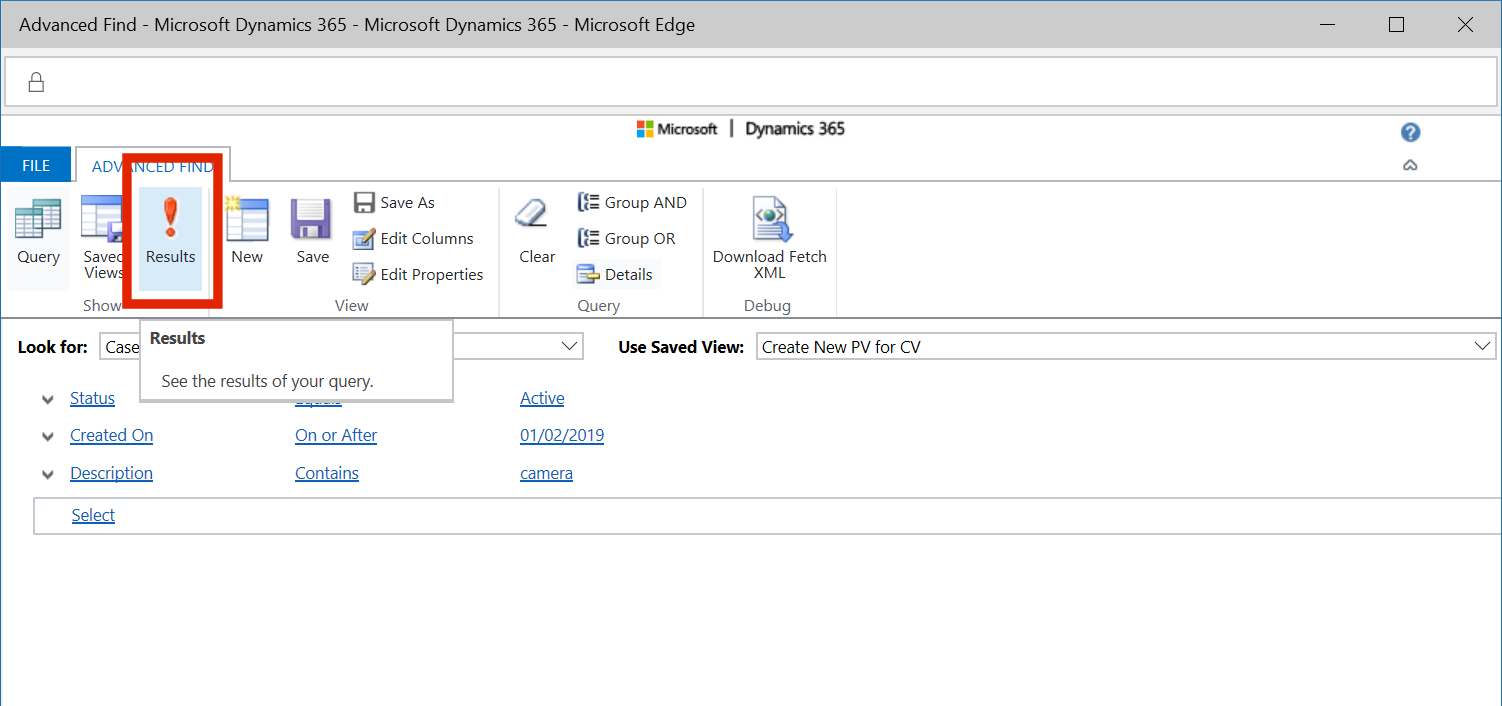
Here is the finished Personal View. To return to editing select the Advanced Find tab – DON’T FORGET TO SAVE